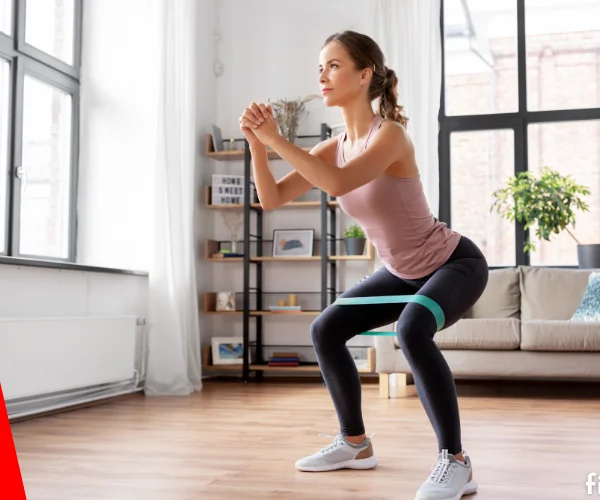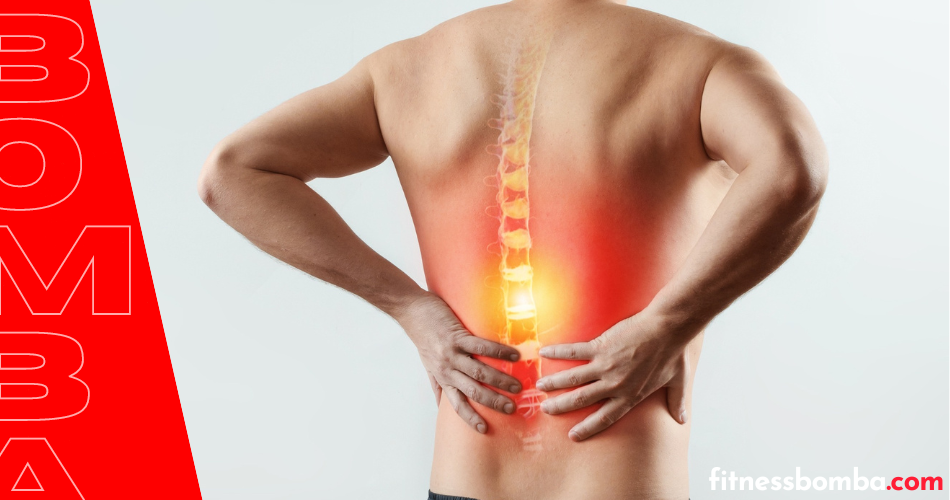
If you’re suffering from lower back pain, you know just how much it can impact your daily life. The good news is that there are simple exercises you can do to strengthen your muscles and alleviate your discomfort.
Lower back pain is often caused by strain or tension in the muscles and ligaments of the lower back. The lumbar spine, which consists of the lower five vertebrae, carries the majority of the weight of your upper body and is responsible for a range of movements, from picking up heavy objects to twisting and walking.
If you have poor posture or a weak core, your body will compensate, placing extra strain on your lower back. Even sitting all day can cause the muscles in your lower back to stretch and extend, leading to pain and discomfort.
To help relieve lower back pain, try incorporating these simple stretches into your daily routine. Aim to hold each stretch for at least 10 seconds, but preferably 30 seconds or longer, as this will increase the pain-relieving benefits.
While you’re stretching, take the time to relax and unwind by playing some soothing music. Don’t forget to breathe deeply, as focusing on your breath can help you manage any discomfort you may experience.
Say goodbye to lower back pain by strengthening your muscles with these easy exercises.
Table of Contents
1. Cat-Cow Stretch:

Looking for a quick exercise that offers multiple benefits? Look no further than the Cat-Cow Stretch! This simple yet effective exercise combines two stretches that gently warm up and stretch the spine while promoting better blood circulation and reducing back pain and stress.
Moreover, mastering weight-bearing is crucial to advancing to more challenging Pilates movements, such as planks. By holding yourself up against gravity, you can effectively strengthen your back muscles and improve your posture automatically. Try adding the Cat-Cow Stretch to your exercise routine today and reap the benefits for your spine and overall well-being!
How to:
- Start on your hands and knees with your wrists directly under your shoulders and your knees directly under your hips.
- Inhale deeply and as you exhale, slowly arch your spine upwards towards the ceiling, tucking your chin into your chest and pulling your belly button towards your spine. This is the “cat” position.
- Hold the cat position for a few breaths, feeling the stretch in your spine and the back of your neck.
- Next, inhale and as you exhale, slowly lower your spine towards the floor, lifting your head and tailbone towards the ceiling. This is the “cow” position.
- Hold the cow position for a few breaths, feeling the stretch in your chest, neck, and lower back.
- Repeat the cat-cow stretch for several rounds, moving back and forth between the two positions with each inhale and exhale.
- Remember to breathe deeply and move slowly and mindfully, focusing on the sensations in your body as you stretch.
2. Glute Bridge:

The glute bridge is a straightforward and adaptable exercise that is favored by beginners as it enhances the strength of your leg muscles and core. The best part about this exercise is that you can perform it practically anywhere without any specific equipment or weights.
The main focus of the glute bridge exercise is on the gluteal muscles, which include the gluteus maximus, medius, and minimus. These muscles are critical in preventing compensation patterns that may lead to overuse injuries in your lower back. Additionally, they help to correct poor posture, like anterior pelvic tilt, by stretching the hip flexors and reducing excessive extension in the lower back.
How to:
- Lie on your back, keeping your feet flat on the ground and bending your knees.
- Contract your glutes and raise your hips off the floor, creating a straight line from your shoulders to your knees.
- Take a brief pause at the top, then return to your starting position. This is considered one repetition.
3. Wall Sits:

Looking for a simple yet effective exercise to burn your quads? Look no further than the wall sit! By targeting the muscles in the front of your thighs, this exercise is perfect for building isometric strength and endurance in your quadriceps, glutes, and calves.
Don’t let the simplicity of the wall sit fool you – it’s important to do it correctly. To ensure proper form, make sure you create a 90-degree angle at your hips and knees, keep your back flat against the wall, and keep your heels on the ground. You’ll feel a slight pulling sensation in your quads. Add the wall sit to your lower body routine today!
How to:
- Stand with your back against a wall, feet shoulder-width apart, and approximately 2 feet from the wall.
- Engage your abdominal muscles and slide your back down the wall until your thighs are parallel to the ground.
- Adjust your feet so that your knees are directly above your ankles and your back is flat against the wall.
- Hold this position for 20 to 60 seconds.
- Slide slowly back up the wall to a standing position.
- Rest for 30 seconds and repeat the exercise three times.
- Increase your hold time in five-second increments as you build strength.
4. Child’s Pose:

Child’s Pose is a great stretch not just for yoga enthusiasts. If you find the stretch too intense, you can place a pillow under your stomach to reduce the stretch on your lower back muscles. You can also use a pillow or a rolled-up towel under your knees for added cushioning. Other yoga poses, like cat/cow stretch, seated forward fold, and downward and upward facing dog, can also help stretch your lower back muscles.
How to:
- Begin on your hands and knees, with your wrists aligned under your shoulders and your knees aligned under your hips.
- Bring your big toes together and widen your knees to hip-width apart.
- Shift your weight back, resting your sit bones on your heels.
- Walk your hands forward and lower your chest onto your thighs.
- Lower your forehead to the floor, resting your elbows, forearms, and palms on the floor in front of you. Alternatively, stack your hands under your forehead for neck support.
- Take slow, deep breaths, focusing on expanding the back of your body on inhales and releasing into the mat on exhales.
- Hold the pose for 10 breath cycles. If you feel any discomfort, adjust the position by placing a pillow or towel under your forehead or knees.
5. Knee-to-Chest Stretch:

If you suffer from osteoporosis, it’s best to steer clear of the knee-to-chest stretch as it may heighten the chance of compression fractures in your vertebrae. Otherwise, this stretch is specifically designed to target the muscles in your lower back.
How to:
- Start by lying on your back with both knees bent and your feet flat on the floor.
- You can keep your left knee bent or extend it straight out along the floor.
- Draw your right knee into your chest and clasp your hands behind your thigh or at the top of your shinbone.
- Be sure to lengthen your spine down to your tailbone and avoid lifting your hips.
- Take a few deep breaths and release any tension.
- Hold this pose for 30 seconds to 1 minute.
- Repeat the same steps with the other leg to experience the full benefits.
6. Cobra Stretch:

Do you suffer from chronic back pain? Cobra Pose could be the solution you’ve been looking for! This fantastic counteraction stretch for your spine and chest can help relieve pressure off the lower back and encourage better spinal alignment. In a recent study, participants who practiced yoga for 12 weeks experienced significant improvement in their lower back pain and even reported lower levels of pain-related anxiety. Don’t let chronic pain hold you back – try Cobra Pose today!
How to:
- Lie face down on your mat.
- Place your forearms on the ground directly under your shoulders and parallel to each other.
- Straighten your legs back behind you, keeping them hip-width apart.
- Spread your toes wide and press the tops of your feet into the mat.
- Firm up your leg muscles, and roll your inner thighs up while bringing your outer thighs down. Lengthen your lower back by pressing your tailbone towards your feet.
- To lift your chest up, press down into your forearms. Sphinx Pose can help improve posture and relieve lower back pain.
7. Quadruped Arm and Leg Raise (Bird-dog):

Looking to strengthen your core and relieve low back pain? Try the bird dog exercise, also known as the quadruped exercise. This easy-to-do home exercise targets your spine, core muscles, hips, and shoulder girdles, helping to improve posture and increase flexibility. Properly executed, it can also enhance rotary stability movement and strengthen your back, gluteal, and scapular stabilizer muscles. Don’t let low back pain hold you back – try the bird dog exercise today!
How to:
- Get into a tabletop position with your hands and knees on the ground.
- Extend one arm and the opposite leg out straight, keeping your hips level. Make sure to maintain a straight line from your extended hand to your extended foot.
- Hold for a few seconds and engage your abs throughout the exercise. If your back starts to sag, adjust your leg height.
- Return to the starting position and repeat on the other side.
- Complete 5 reps on each side or 10 reps total. For variation, do a set of 10 bird dogs on one side and then switch to the other side.
8. Pelvic Tilt:
Looking for a gentle yet effective exercise to alleviate low back pain? Try pelvic tilts! These subtle movements strengthen your core muscles, including your abs, to provide essential support for your spine. Plus, they feel amazing and can even give your back a mini-massage. Learn more about pelvic tilts today.
How to:
- Lie on your back with bent knees and the soles of your feet on the floor. Your lumbar spine will naturally lift slightly off the floor.
- Exhale and gently rock your hips toward your head, feeling your lower back press into the floor.
- Take a few deep breaths in this position, then inhale and return to neutral.
- Repeat for 5 to 10 reps and enjoy the benefits of this gentle yet effective exercise.